
I am using “Reaper” as a Digital Audio Workstation to produce music compositions. The previous part described how I have copied old Portastudio recordings to the digital domain and how I have cleaned them up and synchronised them to a standard tempo.
As part of this exercise I have come across some useful plugins provided by Reaper itself.
All of my old recordings were made using a home made poly synthesizer. This was an analog synth and was not always tuned to the 440 Hz standard. The Portastudio also had a control that could speed up the tape, so some of the recordings are not to a fixed standard. This means that if I want to add a current instrument tuned to 440 Hz standard, I need to adust the pitch of the recordings to match. There is a wealth of “JS” (JesuSonic) plugins that come with Reaper that do loads of useful specific tasks.
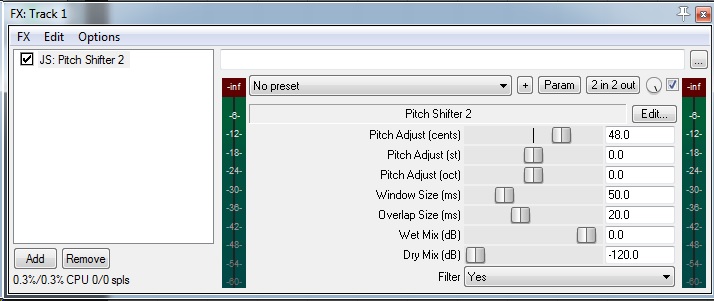
I used the “JS Pitch Shifter 2” plugin and added it to all the Portastudio tracks as the first in the effects chain. I then adjusted the pitch by an amount of cents until the track tuning matched the standard 440 Hz. I simply added a piano instrument and played along to a lead track and adjusted it until I had a good fit. There is a plugin that can analyse the pitch played, but if you have a good ear that works just fine!!
If you are feeling lazy and just want to transcribe a lead track to a MIDI track without having to use your ears, then there is a brilliant wheeze to do this. I used this to beef up a synth lead track with a digital synth and a violin and it is quite a nice effect.
Reaper comes with an auto-tune plugin to do vocal pitch correction called “ReaTune”. This plugin can also track an monophonic instrument track and determine the pitch of the notes played. The neat thing about this plugin is that it can generate MIDI note on/off messages when the pitch changes.
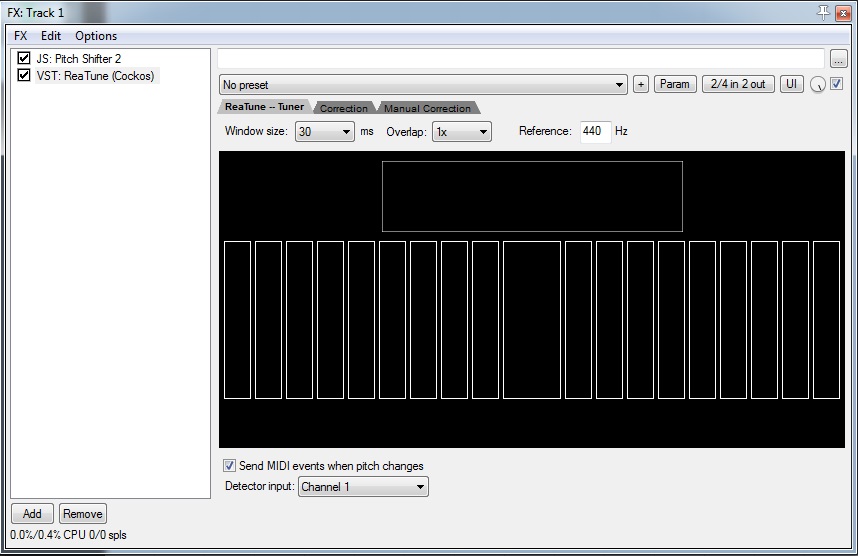
Add the ReaTune plugin to the audio track with the lead synth. Simply check the checkbox “Send MIDI events when pitch changes”. When the audio track is played then MIDI mesages are generated automatically.
The MIDI messages need to be recorded on a new track. Add a new track, press the routing button and add a receive route from the audio track to receive MIDI messages.
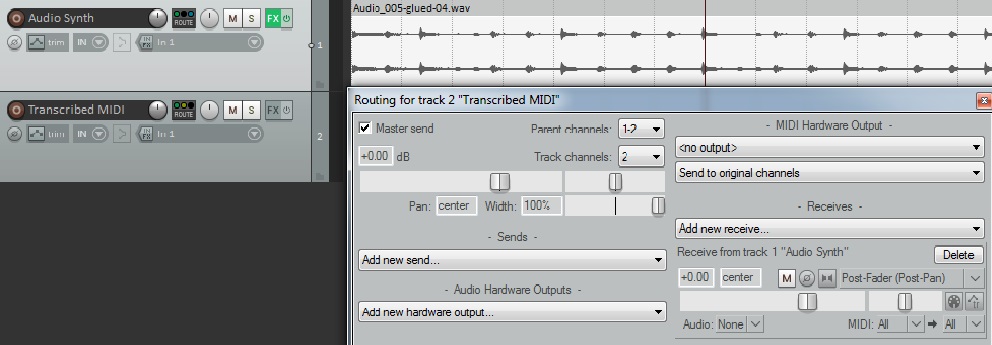
Note that the Audio option at the bottom of the form has been set to “None” (we are only routing MIDI) and the MIDI option at the bottom right has been set “All to All”.
There is another essential step to be done (which rather tried my patience when setting this up). If you don’t do this you will see the MIDI generated by ReaTune but you will get a blank recoding. You have to tell Reaper that the MIDI track is recording MIDI data from an internal source rather from an external keyboard.
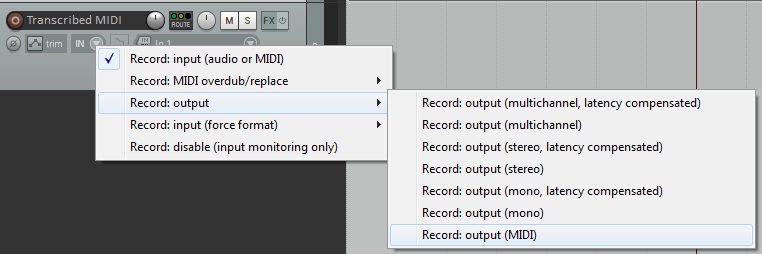
Press the input button for the MIDI track and select “Record Output (MIDI)”. The default is set to Record Input either MIDI of Audio.
You then arm the MIDI track, put the cursor to the start and press record. You will then see MIDI events being recorded.
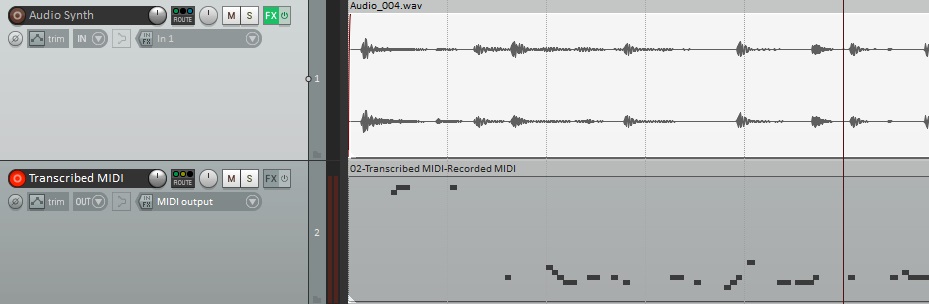
Once you have transcribed the MIDI you can then remove ReaTune from the Audio track, unarm the MIDI track and then add a VSTi instrument to the MIDI track.
Before you play the track it is worthwhile making sure the MIDI track aligns with the audio as there may be some common delay latency. I also edited the MIDI track to take out notes that were accidentally transcribed by ReaTune.