
I am using Reaper Digital Audio Workstation (DAW) to clean up old Portastudio tapes that I copied to my PC. (See previous post). Reaper is inexpensive and you can use it for free to try it out. It is a very sophisticated program that runs on a Windows PC and is of audio studio quality.
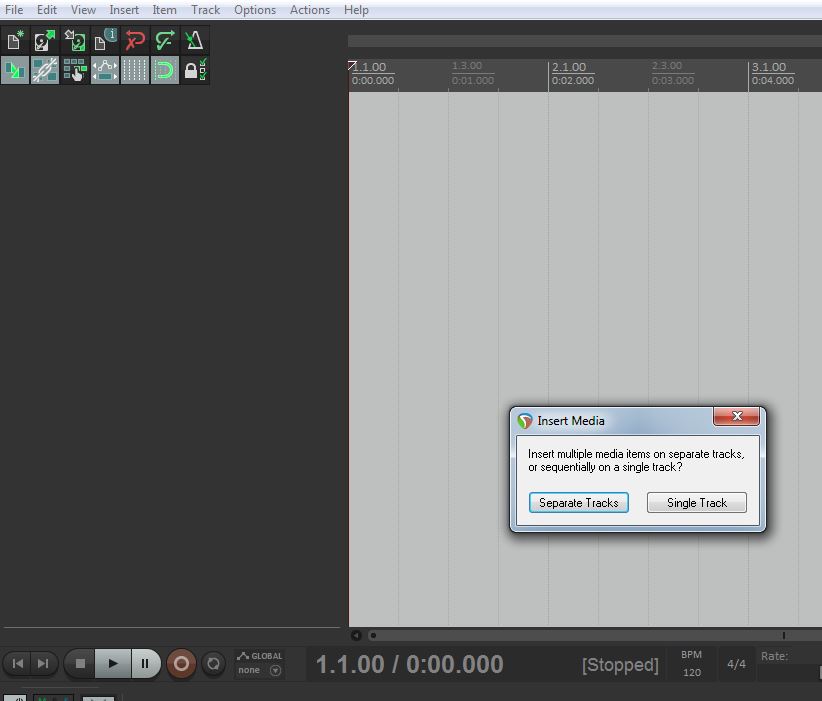
So, first step: Fire up Reaper, start a new project and copy the 4 track Portastudio WAV files into the workspace. Simply drag and drop the files and get Reaper to arrange them as 4 separate tracks..
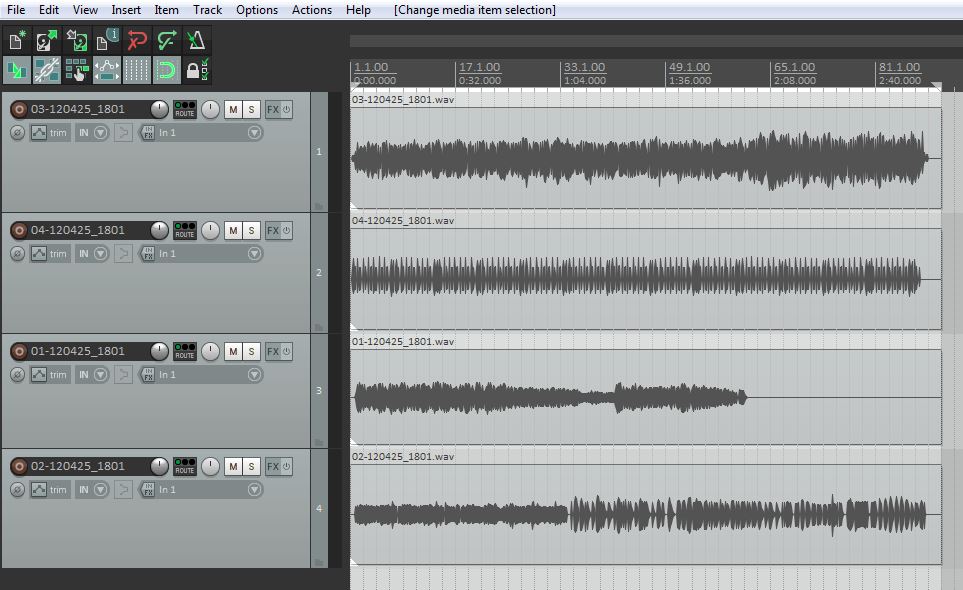
The next screenshot shows the 4 tracks with a whole cassette of music. We are working on a single song, so select all the tracks and set a selection around the part we want. Right click and select “Crop project to selection”.

You will then get just the required bit of music to work on. Note that there is no danger of deleting or altering the original WAV files. In the cropped view you can see that track 2 contains a drum machine track. This is to be replaced by a MIDI drum track.
At the moment I have no idea of the tempo. It is in 4/4 time. So I select all tracks and play from the start.
I press the SHIFT W key at the start of every bar and try and get these as accurately placed as possible. This creates a special time stretch marker (shown as a vertical line on the trace) that can be moved to stretch/reduce the time base for the music. If I move the marker to the left it will speed up the music on the left up to the next marker and slow up the music on the right up to the next marker. The neat thing about this is that the start of the bar can be adjusted to line up exactly with a fixed tempo grid.
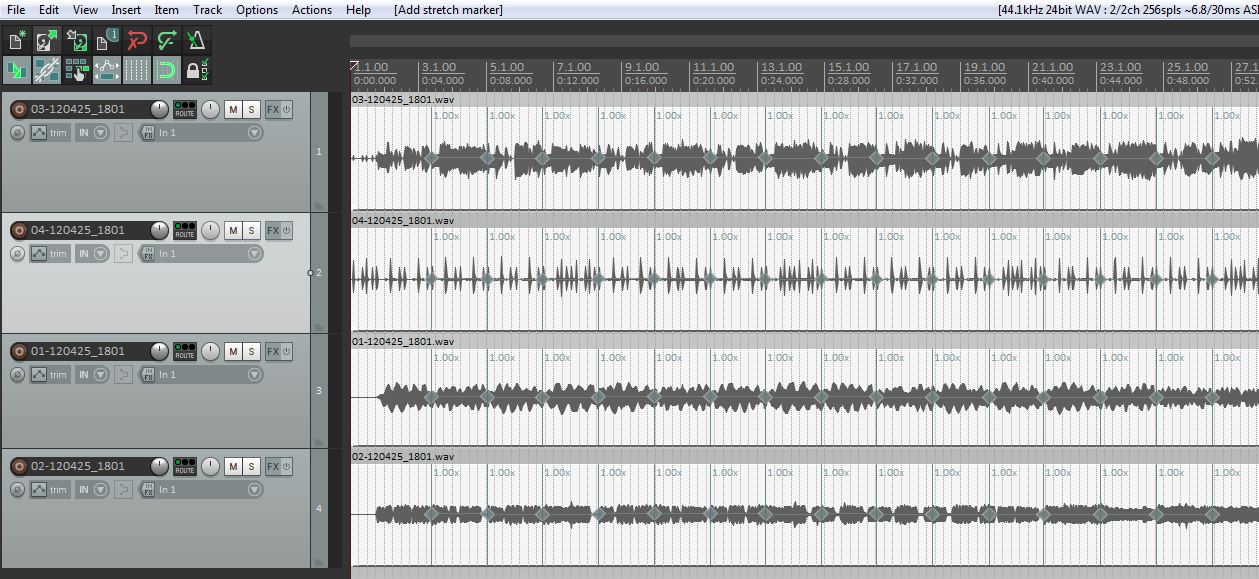
The above screenshot shows all the markers added. You can see that the underlying grid is set to 120 bpm (beats per minute) tempo and does not align with the added markers. The next step is to calculate the average tempo and set the tempo grid so that the markers will line up.

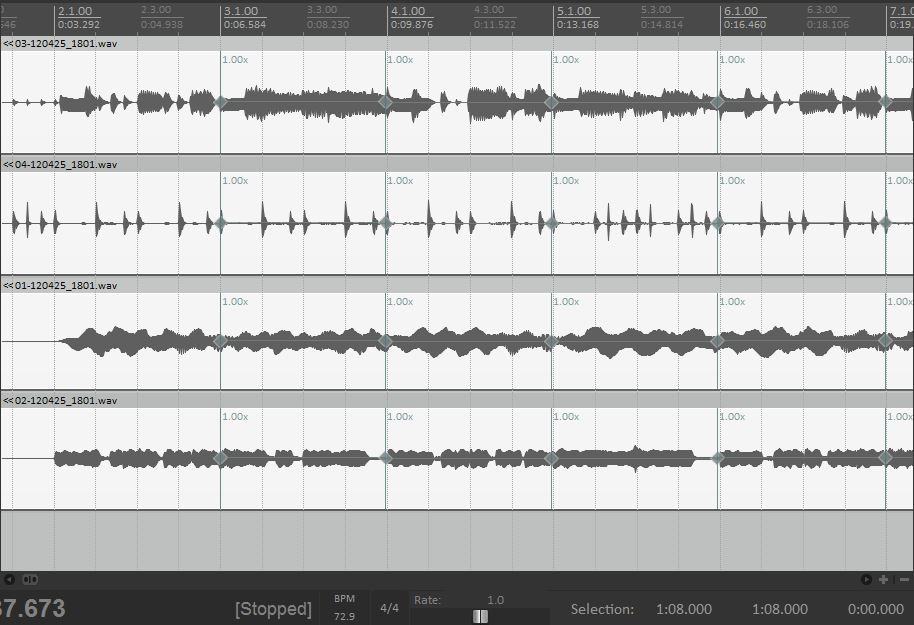
The above screenshot shows just the drum track with markers. Position the cursor on the first marker and read off the time display. You then position the cursor on (say) the eleventh marker and read off the time display. You can then work out the time interval for 10 bars of music and hence calculate the bpm.
In my example:
cursor @ 1 time = 4.8 S
cursor @ 11 time = 37.7 S
Time interval = 37.7 – 4.8 = 32.9 S
Number of bars = 10
Number of beats in 4/4 = 4 * 10 = 40 beats
Tempo (bpm) = (40 x 60) / 32.9 = 72.9 bpm
The next step is to adjust the underlying grid so that the markers align. There is a field to enter the tempo (bpm) under the displayed tracks. When this is changed, Reaper will by default time stretch or reduce the tracks in order to change the tempo. At the moment we do NOT want this behaviour, but adjust the tempo grid independently of the music tracks.
The way to do this is to temporarily turn off the time stretch/reduce function. Go to the “File” main menu and select “Project Settings”. Set the two “Timebase” values to “Time” as shown below.
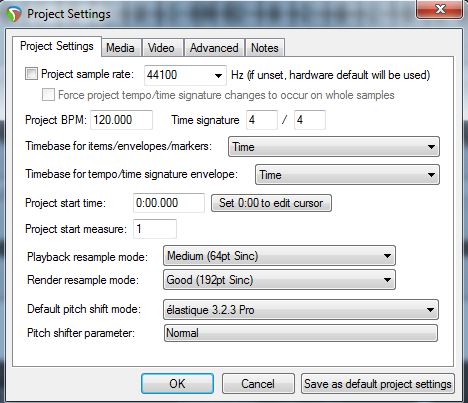
Enable the editing function “Item Edit Grouping Enabled” to allow all tracks to be edited in one go and also turn “Snap To Grid” to off.
Enter the calculate tempo (72.9) to the “bpm” field and this will change the grid spacing.
Select all the tracks and move the tracks to align the first marker with a bar start line.
If you calculations are right and the original keyboard tapping is accurate, you will see the music line up with the tempo display. In my example above, you can see some slight discrepancies with the markers and the beat lines. In my example it is pretty obvious where the markers should be on the drum machine track.
The next step is to adjust the markers to align with the beat lines on the tempo grid. When these markers are moved, the tracks are time stretched to fit.
Select all the tracks, hover the over the diamond symbol on the marker. The cursor will then change to a diamond shape. Press the left mouse button to grab the marker and whilst holding the mouse button down, move the marker to align to its nearest beat line, then release.
Note that it is possible to select a single track and adjust it independently to correct for timing errors in the original performance and so tighten up sloppy playing. Obviously in my example this is not necessary !
Once the process is complete, go back to the project settings dialog and change the timebase values back to their original defaults (beats). The music can then be changed to any desired tempo and the audio will be automatically time stretched or reduced.
In my example I can set the tempo to 85 bpm to speed it up slightly. I can then generate a drum track using a MIDI editor for a tempo of 85 bpm and import it, or I could record a drum machine running at 85 bpm. The old drum track can then be replaced.
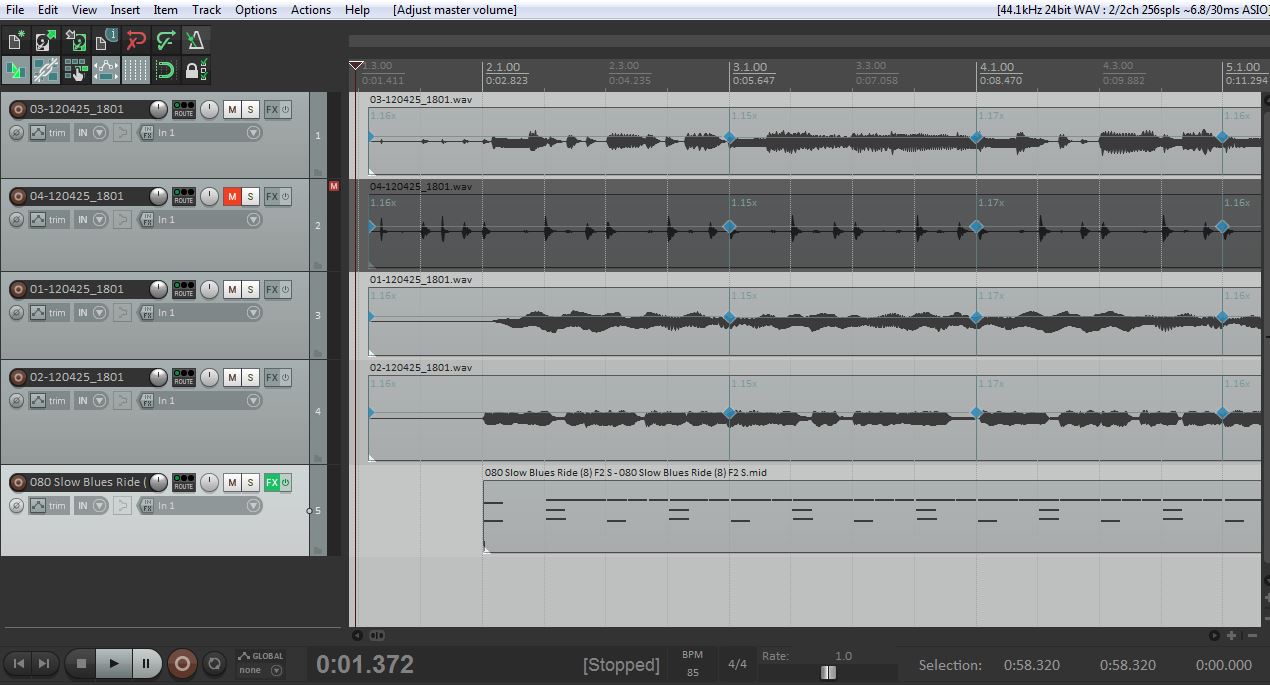
You can see that the original drum track is muted and a new MIDI drum track has been added as Track 5. I have assigned a VSTi instrument to the MIDI track using the fX button and am using a sound font with a standard drum kit.